What are they and how do I use them?
Pupils may be combined into groups called “Classes”. Each Class is a folder within the “Pupils” folder which is located in the “Master Spell” folder or “Master Spell Network” folder. To use this, create new folders within the Pupils folder and name them the Class names. Then drag the Pupils into their appropriate Class folders.
You may create the Class Folders in the Class Selection for the Class Editor and create Pupils in the Class Editor.
Tests may be combined into groups called “Units” in the same way that Pupils can be grouped into Classes. Just create new folders in “Tests” folder and name them their Unit names. Then drag the appropriate Tests into these folders.
Where do they appear?
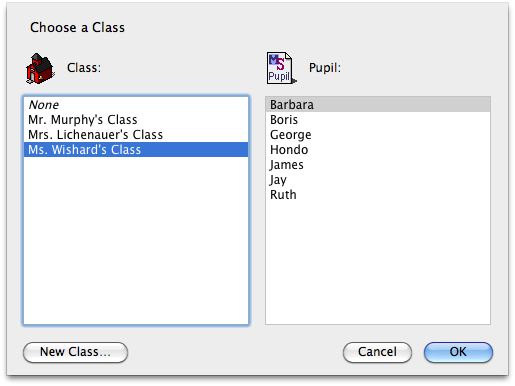
The Class is chosen from the left column in the Choose Pupil… dialog and the Unit is chosen from the left column in the Choose Test… dialog.
Taking Advantage of Classes with the Class Editor
Open the Class Editor by selecting Edit Class… from the Edit menu.
You are then asked to choose the class in much the same way you would be asked when you choose a pupil.
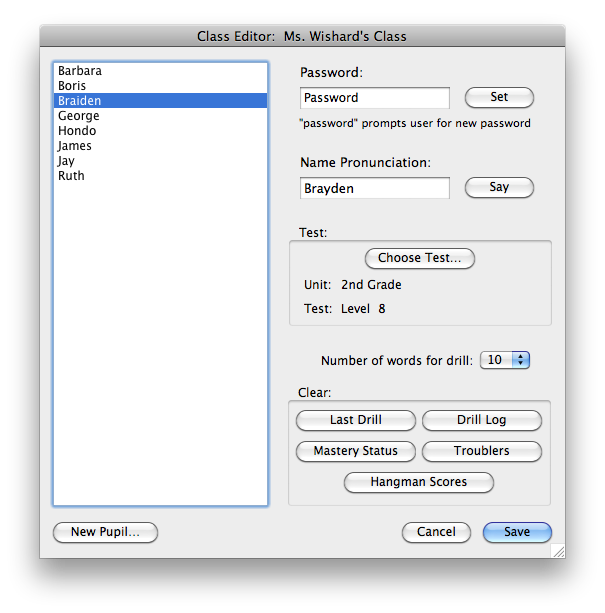
The Class Editor will take a look at all of the pupils in that Class folder and show this list on the right listbox.
The Class Editor does not remove Pupils. Pupils can be removed like any other Mac file in the Finder, look in the Pupils folder.
The name
pronunciation is optional. You can try how Master Spell says the name
without the alternate pronunciation by pressing the say button with
that field blank. If it isn't correct, type it more as it sounds in the
field and try the say button again.
For a class of new Pupils, if you will be setting all of the Pupil passwords, you may also turn off the requirement for Pupil passwords (in the Preferences) while creating new pupils, set them all in the Class Editor, then later turn the Pupil password requirement back on.
If you created pupils without giving them passwords and you don't give them passwords in the Class Editor and you turn on the pupil password requirement in the Preferences, then the pupil will be asked to provide a password when he/she chooses his/her Pupil file.
Tip: To allow the pupils to set their own passwords at login time, set the pupil's password to "password" in the Class Editor.